Video Keyframe Extraction using FFMPEG
introduction
Processing videos are costly because of the large amount of images it contains. But luckily, thanks to video compression algorithm (as explained in much better details in this post) we can use ffmpeg to quickly get out the keyframes (aka I-frames).
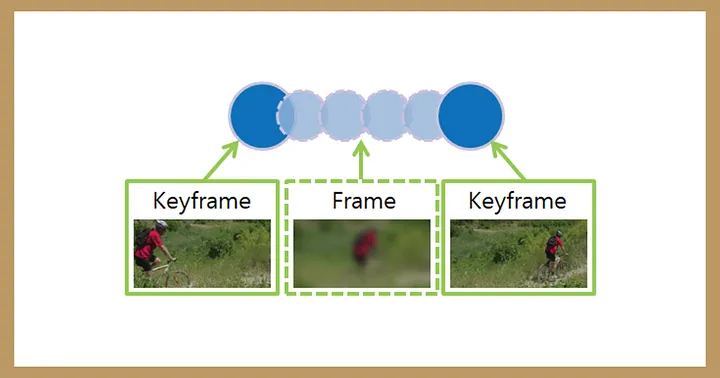
I-frames are basically the highest quality images in a video. The frames surrounding them only stores the “differences” w.r.t. the I-frames.
I-frames Extraction
ffmpeg -skip_frame nokey -i your_video.mp4 \
-vsync 0 -frame_pts true output/dir/iframe_%d.jpgskip_frametells the decoder to process only keyframes-vsync 0preserves timestamps-frame_ptsset the output file’s%dto each keyframe’s presentation timestamp (PTS)
using a filter to select “Contextual Scene Change”
no need for OpenCV, ffmpeg can do this too with a little filter action:
ffmpeg -i your_video.mp4 \
    -vf "select='gt(scene,0.3)'"
-vsync 0 -frame_pts true output/dir/kframe_%d.jpg- the value for
sceneshould be a float between 0 and 1 and it measures the pixel level difference between two frames. So here our threshold is 30%
from personal testing, there are a lot more i-frames than there are “Contextual Scene Changing” frames but they also include them. So there are no need to run both.
If your want to save downstream processing time, then filter for “Contextual Scene Changing” Frames. Otherwise, just use i-frames to be as inclusive as possible!